Initial Startup
You will have two paths here depending on whether you used the Raspberry Pi Imaging tool (or manually added a WiFi configuration file) to create your WiFi configuration.
If you created a WiFi Config
After approximately five minutes (possibly longer if you have a slower SBC,) your dashboard should be available at http://wpsd.local (or replace the hostname before the .local with your chosen name portion if you chose a different one.)
Note
If you installed a ZumSpot disk image, the URL will be
http://zumspot.local.If you installed a SkyBridge disk image, the URL will be
http://skybridge.local.If you installed a DVMEGA Cast disk image, the URL will be
http://dvmega-cast.local.If you installed a DVMEGA EuroNode disk image, the URL will be
http://dvmega-euronode.local.
If you did not create a Wifi Config
After approximately five minutes (possibly longer if you have a slower SBC,) you will see an available access point named WPSD-Setup. Connect your computer to this wireless network. Open your web browser and navigate to http://wpsd.local/. Scroll down to Wireless Configuration and select Configure WiFi.
Either Scan for Networks and select your local network and enter your PSK, or* Add New WiFi Network* and enter your SSID and PSK.
When you have entered the proper network data, you can then “Connect” WPSD to the new saved network. After a few minutes, your dashboard should be available at http://wpsd.local (or replace the hostname before the .local with your chosen name portion if you chose a different one.)
Initial Dashboard Access
On your first visit to the dashboard, you will notice that the system automatically redirects you to the Configuration page.
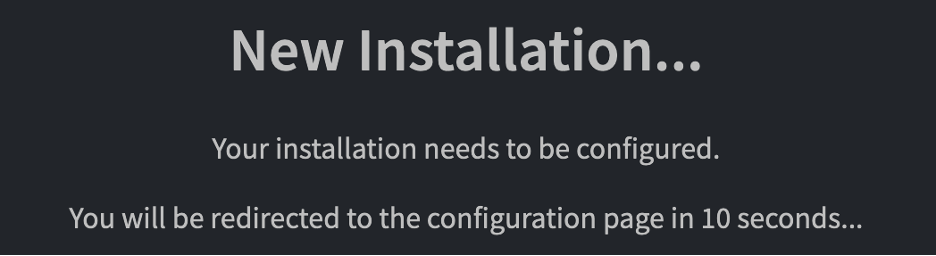
Again, on your first access, you will be prompted for your login credentials:
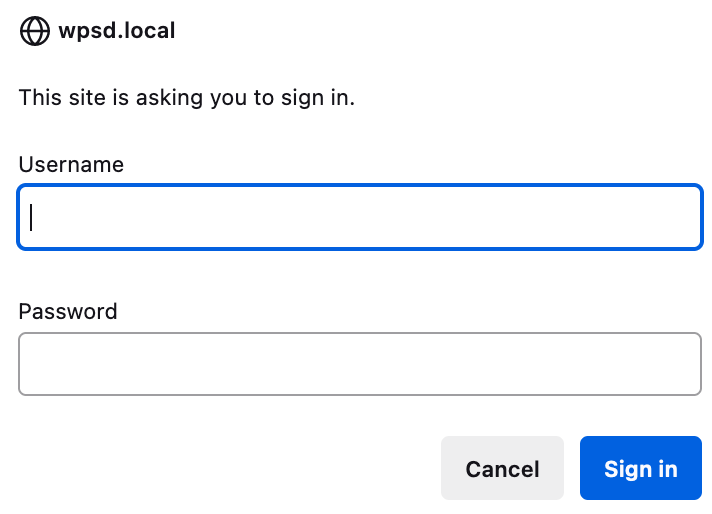
Your login name will be pi-star, and your initial password will be raspberry.
In the future, you can return to the Configuration page by clicking on the Admin -> Configuration link in the dashboard nav bar.

Important
Change this default password before you consider your hotspot “done” — see Changing Your Password below. A hotspot left on pi-star/raspberry is reachable by anyone who can guess or scan for it on your network.
Changing Your Password
On the Configuration page, scroll down to the Remote Access Password section. Enter your new password in both fields and click Set Password.
Note
This one form changes both your dashboard login and your SSH login for the pi-star account at the same time — they’re the same credential, not two separate ones. There’s nothing else to change elsewhere.
Warning
There is no “forgot password” recovery flow built into the dashboard. If you lose access entirely, your options are a Factory Reset (if you can still reach the dashboard) or writing a fresh SD card and restoring from a previously-downloaded backup — which only works if you saved a backup before losing access. Recovering a lost password by editing the SD card’s filesystem directly on another computer is possible but is general Linux system administration, outside the scope of this manual.
General Configuration
Important
You must apply changes you make on the Configuration page of WPSD by clicking the Apply Changes button on the configuration page floating top banner.
The General Configuration section sets up the basic operational information about your hotspot. You must fill in this information for proper operation.
This section is also the first you must complete during the initial startup of a new hotspot.
Simplex Hotspots / Nodes
Hostname |
The hostname for the hotspot on your network |
Node Callsign |
YOUR callsign, do not use anyone else’s |
DMR/CCS7 ID |
Required for DMR Mode (If you don’t have one, get a DMR ID from RadioID.Net) |
NXDN ID |
Required for NXDN Mode (If you don’t have one, get a NXDN ID from RadioID.Net) |
Radio Mode |
Should be set to Simplex for a simplex hotspot board or single radio node |
Radio Frequency |
The frequency desired for operation with the hotspot |
Radio / Modem Type |
The type of hotspot radio board or modem installed on the SBC |
Modem Baud Rate |
The baud rate used for the SBC to communicate with the hotspot radio board |
System Time Zone |
The hotspot’s local time zone. Time format may also be selected (12/24 hour) |
Dashboard Language |
The display language for WPSD |
Duplex Hotspots / Nodes
Hostname |
The hostname for the hotspot on your network |
Node Callsign |
The call sign of the hotspot over the air |
DMR/CCS7 ID |
Required for DMR Mode (If you don’t have one, get a DMR ID from RadioID.Net) |
NXDN ID |
Required for NXDN Mode (If you don’t have one, get a NXDN ID from RadioID.Net) |
Radio Mode |
Should be set to Duplex for a duplex hotspot board or repeater |
Radio Frequency RX |
The receive (uplink) frequency to the hotspot |
Radio Frequency TX |
The transmit (downlink) frequency from the hotspot |
Radio / Modem Type |
The type of hotspot radio board or modem installed on the SBC |
Modem Baud Rate |
The baud rate used for the SBC to communicate with the hotspot radio board |
System Time Zone |
The hotspot’s local time zone. Time format may also be selected (12/24 hour) |
Dashboard Language |
The display language for WPSD |
Important
Please note that the duplex frequencies are for the modem, not your radio. In other words, the radio’s TX frequency should be the modem’s RX frequency and vice versa.
Auto-Updates and Diagnostics
Further down the Configuration page, in its own section, is Auto-Updates and Diagnostics. This toggle is enabled by default and controls whether your hotspot sends encrypted, private diagnostics data to WPSD’s update servers, which is also how it determines whether an update is available.
Warning
Disabling this is a much bigger decision than it sounds like. Turning it off doesn’t just silence a notification — it completely disables all automated and critical WPSD software updates, along with hostfile, talkgroup, and DMR/NXDN user ID database updates. You will also forfeit official WPSD support: the project can’t troubleshoot or support an installation that’s both out of date and sending no diagnostics data.
There is no separate “just stop notifying me, but keep updating” option — this single toggle controls both at once. Leave it enabled unless you specifically understand and accept these trade-offs.
No Modem
If you have yet to select a modem type or the choices have changed, the web page may prompt you to (re) choose one.
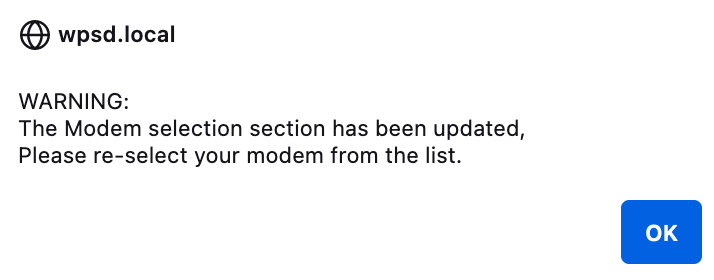
Hint
If yout need to determine the modem type you have installed, run the following command in SSH then select the modem displayed in the result:
sudo wpsd-detectmodem
No Profile
At some point, you will see a banner on the top of the screen prompting you to save your profile:

Follow the link provided, or navigate to to the dashboard, and click the Profiles button. Give your profile a descriptive name. Be aware that non-alphanumeric characters are not permitted. Spaces are allowed.
See Profiles for the full picture of how to create, switch, and delete profiles, and why they’re worth using beyond this first save.
Radio Offset
Your modem supplier may have included documentation about the radio offset. This information is on the underside of the case or the documentation that came with the modem.
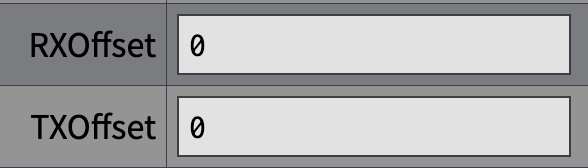
Navigate to: Advanced -> Quick Editors -> MMDVMHost. Scroll to the Modem section and enter your RXOffset and TXOffset in the appropriate fields.
Display Configuration
If your hotspot has a physical screen attached (a Nextion touch display, a small OLED, an HD44780 character LCD, or similar), set it up in the MMDVMHost/Modem Display Configuration section of the Configuration page.
Choose your hardware from the MMDVM Display Type dropdown: None, OLED Type 3 (0.96” screen), OLED Type 6 (1.3” screen), Nextion, Nextion (enhanced w/driver), Nextion (enhanced w/driver, attached to modem), HD44780, TFT Serial, or LCDproc. Set the Display Port alongside it if your display connects over a serial port distinct from your modem.
Nextion displays
Selecting any of the three Nextion options reveals Nextion Display Settings:
Layout Type — choose the HMI layout your Nextion screen is already loaded with:
G4KLX,ON7LDS L2,ON7LDS L3, orON7LDS L3 HS. This tells WPSD which layout to talk to; it does not load or flash a layout file onto the screen itself.Idle Brightness — a slider controlling backlight brightness while the display is idle.
Note
WPSD doesn’t provide a way to upload or flash a Nextion .hmi/.tft layout file from the dashboard. If your display needs a specific layout installed (or a different one than what it shipped with), that’s done directly on the Nextion display itself via its own SD-card-based upload process, following whichever layout author’s instructions apply — outside the scope of this manual. The Layout Type dropdown here only needs to match whatever layout is already on the screen.
OLED displays
Selecting OLED Type 3 or OLED Type 6 reveals a handful of toggles: Screen Saver, Scroll Display (Type 3 only), Rotate Display, and Invert Display. These are cosmetic preferences — try them and see what looks right on your specific screen.
HD44780, TFT Serial, and LCDproc
These three display types are supported but have no dedicated settings panel beyond the shared Display Port field above — select the type that matches your hardware and apply changes.